
There’s a lot you need to do to properly winterize your RV to avoid costly damage during the cold months. By taking a few crucial steps, you can protect your plumbing system, prevent frozen pipes, and ensure your RV is ready for the next adventure when temperatures rise. This guide will equip you with the necessary knowledge to safeguard your investment and extend the life of your vehicle.
Key Takeaways:
- Insulate pipes and water systems to prevent freezing and ensure proper drainage.
- Protect your RV’s exterior with a thorough cleaning and a quality wax application.
- Store batteries in a warm, dry place and maintain proper charge levels for optimal performance.
Understanding Cold-Weather Conditions
Cold-weather conditions can significantly affect the performance and integrity of your RV. Factors like temperature drops, moisture levels, and prolonged exposure to freezing conditions can lead to issues such as frozen pipes, compromised seals, and malfunctioning appliances. Knowing these conditions helps in planning effective winterization measures to keep your RV safe and functional.
Factors to Consider for Winterization
When preparing your RV for winter, consider several key factors that influence its winterization process:
- Temperature fluctuations during winter months
- Humidity levels inside your RV
- Insulation quality of your RV
- Duration of storage during winter
Assume that each factor requires specific attention to prevent damage and ensure comfort.
Importance of Preparation
Preparation for cold-weather RVing is important to avoid costly repairs and ensure your RV remains livable. Procrastination can lead to severe damage, jeopardizing your future adventures. Proper winterization extends the lifespan of your vehicle and protects your investment.
By meticulously preparing, you can mitigate risks associated with cold weather, such as frozen water lines and battery failure. Historical data shows that RVs improperly winterized can incur expensive damages, sometimes exceeding thousands of dollars. Investing time in preparation not only saves you money but also guarantees peace of mind for your cold-weather travels.
Essential Winterization Tips
Properly winterizing your RV ensures it can withstand the cold while avoiding damage and costly repairs. Essential steps include:
- Insulating the interior to retain heat
- Draining and flushing the water system
- Protecting exterior surfaces from snow and ice
- Using RV antifreeze in plumbing
Perceiving the importance of these actions can save you headaches down the road. For budget-friendly ideas on Winterizing an RV on a budget?
Insulating Your RV
Effective insulation is vital when winterizing your RV. Ensure you seal gaps and cracks to keep the cold air out, using foam or weather stripping as needed. Additionally, consider using privacy shades or thermal curtains to maintain warmth inside. These measures significantly enhance comfort and create a more energy-efficient environment during colder months.
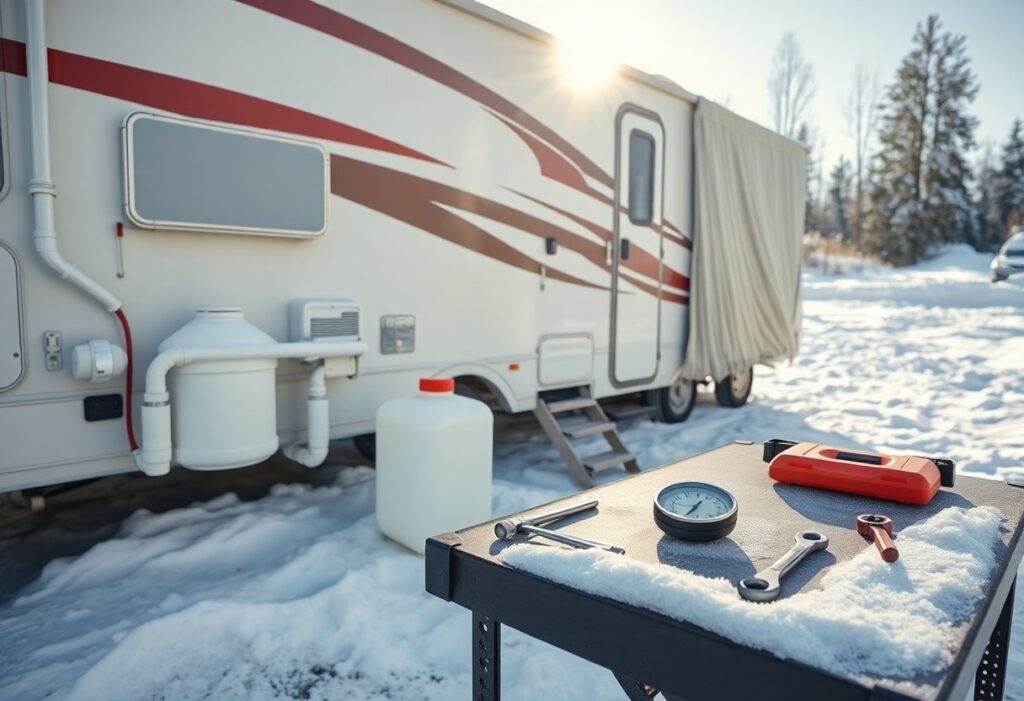
Protecting Your Plumbing
Protecting your plumbing is necessary to avoid freezing pipes that can lead to extensive damage. Start by draining the water system completely and adding RV antifreeze to all plumbing fixtures. This will not only keep the pipes functioning but also ensure no stagnant water remains, which can freeze when temperatures drop.
The primary objective in protecting your plumbing is to eliminate any risk of freeze-related issues. Begin by opening faucets and running the water until it fully drains from the system. Afterward, pour antifreeze into all drain traps and toilets, ensuring a proper seal from freezing temperatures. This proactive approach safeguards your RV and minimizes the risk of repairs in the spring.
Battery Care in Winter
To keep your RV’s batteries healthy during winter, regular maintenance is crucial. Start by ensuring the battery is fully charged before storing your RV. This prevents sulfation, which occurs when batteries sit in a discharged state. Additionally, disconnect the negative terminal, and consider using a trickle charger or battery maintainer to keep it topped off. For a detailed guide, check out Winterizing for dummies. Proper care ensures longevity and reliability.
Maintenance Best Practices
Regularly inspect your battery for corrosion, and clean the terminals as needed. Use a mixture of baking soda and water to neutralize any corrosion. Additionally, check the fluid levels in lead-acid batteries, topping them off with distilled water if necessary. Keeping your batteries clean and properly maintained can prevent unexpected failures when you need power the most.
Checking Battery Efficiency
Evaluating your battery’s efficiency involves testing its voltage and load capacity. Use a multimeter to check if the voltage is within the recommended range, typically around 12.6 volts for a fully charged battery. A load tester can confirm whether your battery can sustain power under load conditions. If readings are below adequate levels, consider replacing the battery to avoid unexpected failures.
For specific efficiency testing, detach your battery and ensure it’s at full charge before testing. After confirming it’s fully charged, measure the voltage with a multimeter. If the voltage drops significantly under load during a load test, this indicates a weak battery and signals the need for replacement. Monitor these readings periodically throughout winter, as this proactive approach can save you from unexpected power issues when you’re ready to hit the road.
Heating Your RV
Effective heating is vital for making your RV comfortable during winter trips. Various heating options cater to different needs, whether you’re parked at a campsite or boondocking in the wilderness. Selecting the right system helps you maintain a warm interior without compromising your RV’s power supply.
Types of Heaters
| Type | Features |
| Furnaces | Run on propane and provide strong heat. |
| Portable Heaters | Electric, easy to move, ideal for boondocking. |
| Heat Pumps | Energy-efficient, suitable for milder climates. |
| Radiant Floor Heating | Offers even heat distribution. |
| Wood Burning Stoves | Great for off-grid heating, adds ambiance. |
Any heating choice requires proper installation and regular maintenance for optimal performance.
Safety Tips for Heating
When heating your RV, prioritize safety to prevent fire hazards and ensure ventilation. Always install a carbon monoxide detector and check for gas leaks before use. If you’re using a propane heater, ensure proper airflow to reduce the risk of carbon monoxide buildup.
- Monitor exhaust regularly for any issues.
- Use appropriate ventilation when operating heat sources.
- Check for gas leaks before starting your heater.
- Keep combustibles away from heating elements.
- Regularly inspect your heating equipment.
Recognizing potential hazards in your heating setup can save you from serious dangers.
Like any crucial appliance, your heating system requires regular attention. Ensure that the heating elements are clean and functioning properly. Familiarize yourself with your specific heater’s safety requirements, and always err on the side of caution when it comes to indoor heating. Ignoring warning signs can lead to dangerous situations for you and your passengers.
- Regular maintenance is key to ensuring efficiency.
- Understand your heater’s specifics to stay safe.
- Designate a safe space for portable heaters.
- Test carbon monoxide detectors monthly.
- Educate yourself on safety protocols.
Recognizing safety needs can prevent accidents and protect your RV from damage.
Checking and Sealing Seams
Before winter hits, it’s vital to inspect your RV’s seams for any signs of wear or damage. Over time, exposure to the elements can lead to weakened seals that may allow cold air, moisture, or even pests to enter. A thorough inspection helps identify potential issues, ensuring your RV remains snug and protected throughout the winter months.
Identifying Vulnerable Areas
Focus on areas where different materials meet, such as around windows, doors, and roof seams. These locations are particularly susceptible to leaks and drafts. Inspect the caulking for cracks or peeling, and pay attention to any gaps that could compromise insulation. It’s smart to check your RV’s corners and edges, as these are common weak points.
Applying Sealants Effectively
After identifying vulnerable areas, choose a high-quality sealant specifically designed for RV exteriors. Clean the surfaces thoroughly, removing old sealants, dirt, and debris to ensure a good bond. Apply the sealant evenly, filling gaps completely, and smooth it out for a neat finish. For optimal results, work on a cooler day to allow the sealant to cure properly without exposure to excessive heat.
When applying sealants, precision is key. Use a caulking gun for control and consider a self-leveling sealant for horizontal surfaces to ensure a clean finish. Apply a bead that exceeds the gap size slightly to ensure a solid seal. Check the manufacturer’s instructions for drying times and conditions, as some sealants require specific environmental conditions to adhere properly. This attention to detail will not only prolong the life of the seals but will also greatly enhance your RV’s protection against winter elements.
Storing Your RV for the Winter
Effective winter storage is crucial for protecting your RV from cold-weather damage. A well-executed plan includes proper drainage of water systems and thorough cleaning before storage. To ease your spring preparation, check out this insightful guide on De-winterizing your RV and Prepping for Spring.
Choosing the Right Location
Your RV’s winter storage location plays a significant role in its preservation. Opt for a dry, sheltered area that minimizes exposure to harsh weather and debris. If possible, select a location with easy access for future checks or maintenance. Avoid low-lying areas prone to flooding, as moisture can lead to mold and rot.
Covering and Protecting Your RV
Protecting your RV with a high-quality cover serves as a barrier against snow, ice, and UV damage. A breathable material will help prevent moisture buildup, while ensuring that it fits snugly reduces the chance of wind damage. Choose a cover designed for your RV’s specific dimensions for optimal protection.
Investing in a durable cover not only extends the life of your RV but also saves on potential repairs down the line. Consider adding protective layers like tire covers or moisture absorbers, which will further shield your vehicle from the elements. Regularly inspecting your RV throughout the winter ensures early detection of any issues, allowing you to address them promptly and prevent costly repairs later.
Summing up
Taking this into account, winterizing your RV for cold weather is crucial to protect your investment and ensure a hassle-free experience. By insulating water lines, draining tanks, and using antifreeze, you can prevent damage and freezing. Additionally, securing your RV against moisture and checking the roof and seals will maintain its integrity in harsh conditions. Taking these practical steps allows you to enjoy your winter travels without the stress of potential issues, keeping your RV in optimal condition until spring.