
There’s nothing worse than discovering a leak in your RV, which can lead to costly damages and mold issues. By implementing regular sealant maintenance, you can protect your investment and enjoy traveling without worries. In this guide, you’ll learn crucial seasonal tips to keep your RV in top shape, ensuring that your adventures remain dry and enjoyable throughout the year. Follow these practical steps to secure your vehicle and prevent leaks from becoming a major hassle.
Key Takeaways:
- Regularly inspect sealants for cracks or wear to prevent leaks. Check seams, corners, and roof seals, especially after storms.
- Choose the right type of sealant for your RV materials; utilize silicone or polyurethane based on the area being sealed.
- Perform seasonal maintenance by cleaning the surface prior to applying new sealant to ensure optimal adhesion and effectiveness.
Understanding RV Leaks
In terms of RV maintenance, understanding leaks is imperative for ensuring a long lifespan. RV leaks can spring up from various sources, leading to potential damage that compromises your comfort and safety. Water intrusion could originate from poorly sealed seams, damaged roofing, or faulty plumbing. Identifying the signs early helps you take preventative measures and protect your investment.
Common Causes of RV Leaks
Several factors contribute to RV leaks, with *sealant deterioration* being the most prominent. Over time, exposure to UV rays and extreme weather can degrade the materials, resulting in cracks and gaps. Additionally, improper installation of accessories like skylights and vents can create vulnerabilities. *Water damage from plumbing issues* and age-related wear further exacerbate the problem, making it vital to address these issues promptly.
Importance of Regular Maintenance
Regular maintenance is vital to keeping your RV leak-free. Conducting routine inspections allows you to identify potential problems before they escalate, saving you money and stress. With annual sealant checks and timely repairs, you can prolong the life of your RV’s structure and fixtures, ensuring a worry-free travel experience. Neglecting these tasks can lead to costly repairs and significant downtime, ultimately affecting your adventures on the road.
Seasonal Maintenance Tips
Maintaining a leak-free RV requires attention throughout the year. Adjust your maintenance routine with the seasons to protect your investment. Follow these key tips:
- Inspect rubber seals for dryness
- Reapply sealants as needed
- Clean roof surfaces regularly
- Utilize UV protectants during summer
- Prepare for winter by insulating
Recognizing the seasonal changes allows you to address potential leaks before they become problematic. Get more details in the Born Free Leap’n Lions RV Club Info & Discussion Forum.
Spring: Inspecting Seals and Seams
This is the perfect time to inspect all seals and seams for damage after winter. Look for cracks, peeling, or separation from the surface. Make necessary repairs before use to ensure a water-tight fit, preventing future leaks.
Summer: Protecting From UV Damage
In summer, UV rays can cause significant deterioration of rubber seals and exterior surfaces. Regular application of UV protectant can help maintain the integrity of your RV’s exterior.
Choose a high-quality UV protectant specifically designed for RVs. Applying it every few months can significantly extend the lifespan of your seals and paint, ensuring your RV remains leak-free. Additionally, consider using an RV cover when stationary to provide extra protection from harsh sunlight.
Fall: Preparing for Winter Storage
As autumn approaches, take the opportunity to thoroughly clean your RV and prepare it for winter. Check all joints and seams for any signs of wear that may have developed over the year.
It’s vital to properly seal any existing leaks before storing your RV. Drain all water systems to prevent freezing and damage. Utilizing a high-quality sealant will safeguard against leaks that can occur from snow or freezing rain during the winter months.
Winter: Insulating against Cold
During winter, protect your RV from freezing temperatures by ensuring all insulation is intact. This will prevent internal water lines from freezing and bursting.
Be proactive by insulating areas like windows, doors, and plumbing. Consider using foam insulation or pipe wraps for vulnerable areas. Adding a heated RV mat can help keep your water system safe from freezing, maintaining functionality until warmer months return.
Choosing the Right Sealant
Selecting the appropriate sealant for your RV can significantly impact its leak resistance and longevity. The right sealant will create a durable barrier against moisture, ensuring the protection of your vehicle’s components. Consider factors like the surface material and the type of exposure your RV faces to ensure optimal performance.
Types of Sealants
There are various types of sealants available for RV maintenance, each suitable for different applications.
| Silicone Sealants | Flexible, waterproof, and ideal for windows and seams. |
| Polyurethane Sealants | Strong adhesion and good for high movement areas. |
| Latex Sealants | Easy to apply and great for indoor use. |
| Acrylic Sealants | Paintable and suited for minor gaps and joints. |
| Butyl Rubber Sealants | Excellent for roofs and provides long-lasting elasticity. |
Perceiving the specific needs of your RV helps in choosing the best sealant type.
Factors to Consider
When choosing a sealant, several factors will influence your decision, ensuring a strong and lasting protection for your RV.
- Material compatibility: Ensure the sealant bonds well with your RV’s surfaces.
- Temperature resistance: Choose sealants suited for varying conditions you may encounter.
- Application environment: Consider whether the application will be indoors or outdoors.
- Movement accommodation: Select sealants that can handle expansion and contraction.
- Drying time: Be aware of how quickly each sealant cures to plan your maintenance schedule.
Recognizing these factors enables you to make informed decisions regarding sealants tailored for your RV.
In-depth consideration of these factors can lead to a more effective sealing solution. For instance, if your RV predominantly travels in hot climates, a sealant with high temperature resistance is important to avoid failure. Similarly, if the vehicle is constantly exposed to moisture, picking a waterproof sealant becomes non-negotiable. Prioritize material compatibility to ensure the longevity of the bond with your RV. Documenting your experiences and preferences with different sealants can offer insights for future maintenance. Recognizing the distinct needs of your RV will make your sealant selection process much smoother.
- Indoor vs outdoor use: Different environments require different sealants.
- Ease of application: Some sealants may be user-friendly while others require expertise.
- Longevity: Choose sealants that offer long-lasting protection.
- Cost: Balance quality with your budget to find an economical solution.
- Viscosity: Ensure the sealant spreads evenly for complete coverage.
Recognizing these additional criteria enhances your ability to choose a sealant that meets your RV’s specific requirements.
How to Apply Sealant Effectively
Applying sealant requires precision and care to ensure long-lasting protection. Begin by selecting the right sealant type for your RV and prepping the surface properly. For re-sealing tips for clean lines and less mess, maintain a steady hand and apply in a well-ventilated area to enhance adhesion.
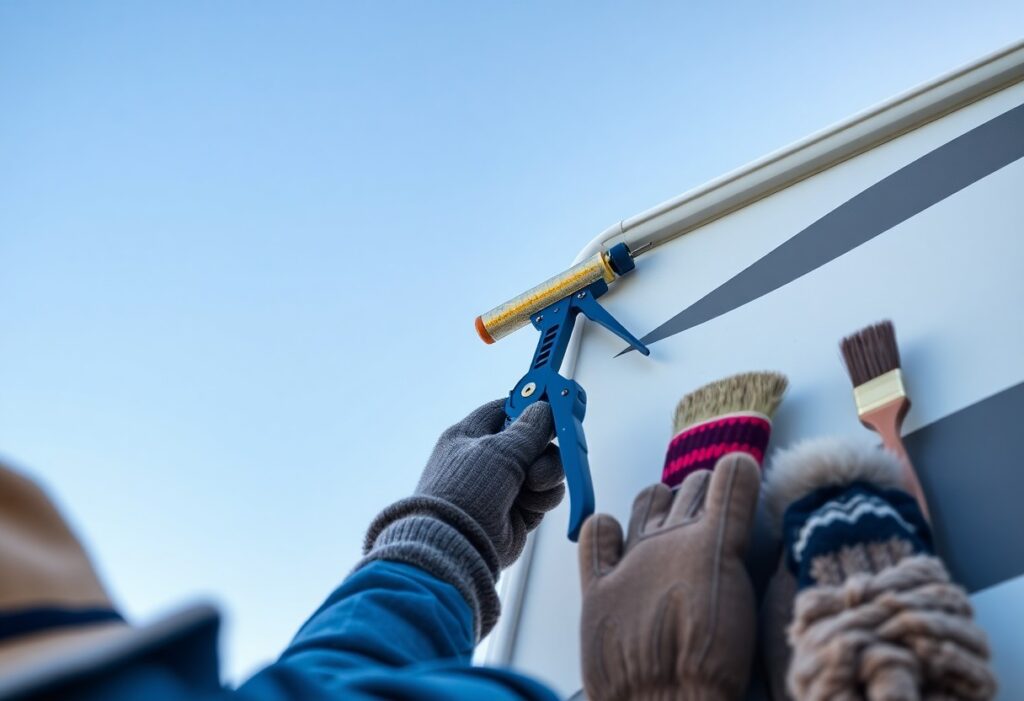
Preparation and Tools Needed
To prepare for sealant application, gather necessary tools: a caulking gun, utility knife, masking tape, and cleaning supplies like isopropyl alcohol. Ensure the surface is clean and dry before you start, as any debris can compromise the seal. Using masking tape helps create crisp lines and minimizes excess sealant cleanup.
Step-by-Step Application Guide
Follow these steps for effective sealant application. Clean surfaces thoroughly, then apply masking tape where necessary. Cut the sealant tube tip to your desired bead size, insert it into the caulking gun, and apply an even bead along joints and seams. Finally, smooth the sealant with a finger or tool before removing the tape.
| Step 1: Clean surfaces thoroughly | Ensure they are dry and free from debris. |
| Step 2: Mask off areas | Apply masking tape to achieve clean lines. |
| Step 3: Cut sealant tube | Slice the tip of the sealant for even dispensing. |
| Step 4: Apply with a steady hand | Run the sealant along joints and seams evenly. |
| Step 5: Smooth out the sealant | Use a finger or tool to achieve a finished look. |
After applying sealant, allow it to cure based on the manufacturer’s instructions. Typically, this takes 24 hours, but this can vary depending on the product. Keep your RV protected by regularly inspecting the sealant for wear and reapply as needed. Monitoring these details can extend the life of your investment considerably.
| Tip 1: Check weather conditions | Avoid applying sealant in rainy or humid conditions. |
| Tip 2: Use quality sealant | Invest in high-grade materials for better longevity. |
| Tip 3: Regular maintenance | Schedule inspections every season to catch potential issues early. |
Regular Inspection Checklist
Having a thorough inspection checklist can make all the difference in maintaining a leak-free RV. Regularly assess the condition of your RV’s exterior sealants and check for signs of wear or damage. This proactive approach helps you catch potential issues early, saving you costly repairs down the road. Include both visual inspections and tactile checks to ensure comprehensive coverage.
Key Areas to Check
Your inspection should focus on key areas where leaks commonly occur. Pay close attention to the roof seams, windows, doors, and any exterior fittings like vents or awnings. These locations are particularly vulnerable to wear from weather exposure, so inspect for cracking or peeling sealant. Don’t overlook the undercarriage, where rust and leaks can develop unnoticed.
Frequency of Inspections
Establishing a routine for inspections is crucial for your RV’s upkeep. Conduct checks at least every season, ideally before long trips and after significant weather events. Regularly inspecting your RV helps you stay ahead of potential leaks.
In addition to seasonal inspections, perform a quick visual check after every trip. This immediate assessment allows you to identify any new issues caused by travel, such as rattling components or newly formed cracks. Keeping a maintenance log can also help track any changes in sealant condition over time, ensuring your RV remains leak-free and ready for your next adventure.
Troubleshooting Common Issues
Even with diligent maintenance, you may encounter leaks or weak spots in your RV’s sealant. Regular inspections are vital for identifying these problems early. Common signs include water stains or dampness in walls and around windows. For practical insights, check out this RV tech giving maintenance tip : r/RVLiving.
Identifying Problem Areas
Start by examining areas prone to leaks, such as roof seams, window edges, and door frames. Pay special attention to any visible cracks or degradation in the sealant. You can perform a simple water test by spraying affected areas with a hose and checking for leaks inside. This proactive approach can save you from extensive damage down the line.
When to Seek Professional Help
If you discover extensive damage or your leak situation persists despite repairs, it’s time to consult a professional. Attempting to fix significant leaks yourself may lead to further complications, such as mold growth or structural damage, which can be costly.
Professional RV technicians possess the expertise to thoroughly assess and repair complex issues, ensuring all leak points are addressed. They can assess hidden damages that you might overlook, recommend appropriate sealants or repairs, and offer peace of mind. Investing in expert help is often more economical than extensive future repairs caused by unresolved leaks.
Conclusion
So, maintaining a leak-free RV requires your proactive approach to sealant care year-round. Regularly check and clean the seals, updating them as weather conditions change with the seasons. By using the right sealants and applying them frequently, you can protect your investment and ensure your travels are worry-free. Keeping your RV well-sealed not only prevents damage but also enhances your overall experience on the road, giving you peace of mind for every adventure.